
User Guide | ||
Frequently Asked Questions | ||
Introduction
Adelaide Bank DocSend
Adelaide Bank DocSend is a secure, simple, fast document upload solution for submitting documentation to the Bank.
DocSend is a web interface that allows users to upload supporting documents for loan applications.
In a few quick steps documents can be uploaded and transferred to the appropriate area of the Bank for processing.
Once uploaded, documents are virus scanned, converted to a format suitable for the Bank's processing systems and routed to the correct destination.
Features of DocSend
- Large document capacity (800+ pages) or 100MB per document
- Automatic merge capability eliminates the need to merge multiple documents into one file for upload
- Optional e-mail notification of successful transmissions
- Real-time document upload tracking
- Transaction history provides status of previous uploads
- Routing of documents to applications in progress
- Conversion of Serviceability Calculator means no need to print or scan.
- Scalable to handle large numbers of concurrent users
Business solutions to suit
Web interface Upload - a secure web interface accessed via browser that allows the Bank's partners (Mortgage Originators, Mortgage Managers and Mortgage Brokers) to upload supporting documents and have them directly transferred to the appropriate area of the Bank for processing.
Automated Receive Port - is a secure method of automating the upload and submission of documents to DocSend. The ARP is a RESTful web service that allows any third-party application / platform to integrate with DocSend. Automating the submission of documents via this service can help support efficiency for your business by:
- Enabling a business to business solution that allows you to implement an end to end process within your application without the need to log onto a separate web site for document upload.
- Providing a way to upload after hours so not to impact your businesses internet data quota and speeds; many users uploading documents at once can bottleneck outgoing communications. Automating the upload process can help monitor and control the amount being uploaded so that other activities are not impacted.
- Providing a way to minimise wait time for users; depending on location, infrastructure in your area, and your internet service provider, upload speeds can vary greatly. In the case of large files this can mean that you are required to keep the browser open while uploading. If your upload speeds are limited, having a local networked server do the uploading via the ARP may be an appropriate alternative to eliminate this wait time.
In order to leverage the ARP service the technical skills of a software development team are required. If you would like to know more about the ARP and how to leverage it for your business please contact your Business Development Manager for more information.
Download – a secure web interface access via browser that allows Margin Lending users the ability to download reports including Commission Reports, SWIFT Transfer confirmations and Deferred Responses such as Draw Downs and Holdings.
The Adelaide Bank solution offers
- Security for sensitive information
- Fast uploading of documents for either manual or electronic loan submissions
- A flexible solution for new applications and amendments
- A simple Business to Business solution supporting our partners' processes and technology solutions
- An ability to upload large and multiple documents
[ Top - Close Window ]
Access and Credentials
Web Address
https://docsend.adelaidebank.com.auInternet Browser and Connectivity
Adelaide Bank DocSend has been designed and tested to accommodate a variety of browsers, however for optimal performance it is recommended that the latest version of the following browsers be used:
- Microsoft Internet Explorer v10 (or higher) / Edge v14 (or higher)
- Google Chrome v63 (or higher)
- Mozilla Firefox v58 (or higher)
- Safari v8 (or higher)
For large file uploads, it is recommended that the user has access to a high-speed broadband internet connection.
DocSend performance information
Selecting Files
Given Australia's service for upload rates we anticipate that a 100MB file will take 3 - 4 minutes to upload. We also
acknowledge that the speed for businesses may be better than that for households. However, in some
organisations download / upload speeds from individual's computer are caped in order to reduce bandwidth
consumption across large offices. Depending on how internet connectivity is implemented, users may experience
internet akin to the 3.9Mbps link that they are familiar with at home.
Is the time it takes from when the Submit button is selected or when a third party application sends the submit request until the time an email notification is sent to indicate delivery has been successful.
The estimated expected upload time during peak usage periods are:
- 1 to 100 pages approximately up to 6 minutes
- 100 to 500 pages approximately up to 10 minutes
- 500 to 800 pages approximately up to 15 minutes
- Uploads exceeding 800 pages can still be submitted however upload time may be slower.
[ Top - Close Window ]
How do I get access to DocSend?
Mortgage Brokers
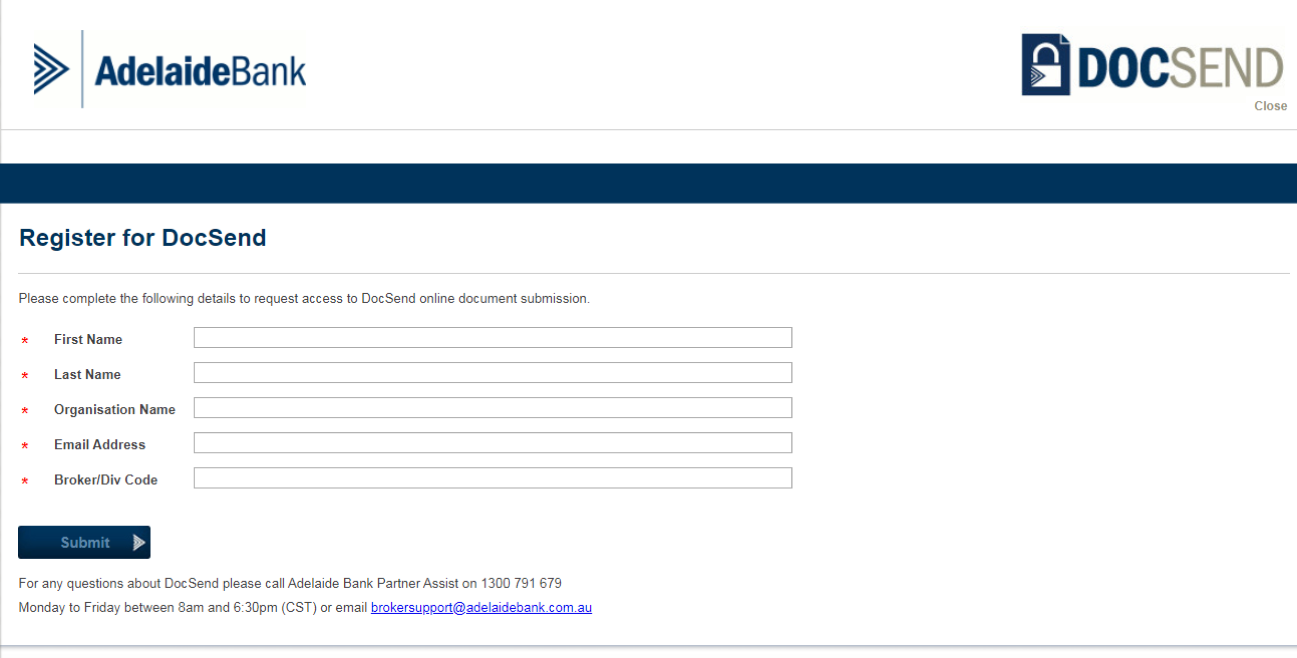
Requests for access can be submitted directly via DocSend. Click on the Register link on the home page and complete the online form.
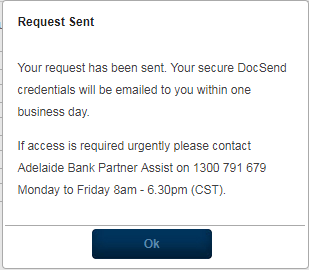
On Submit a pop up will confirm that your request for access has been sent to Adelaide Bank Partner Assist.
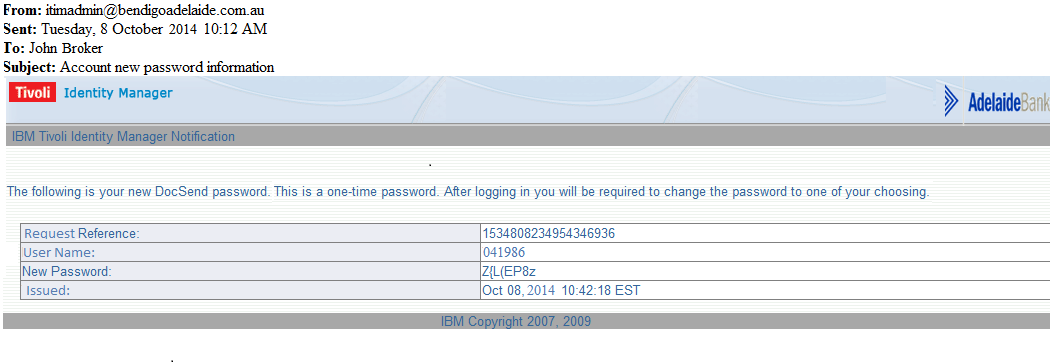
Your request will be processed and credentials issued by the Banks user management system, Tivoli Access Manager and sent to the nominated e-mail address.
Mortgage Managers and Originators
Requests for access can be directed to your Business Relationship Manager.
[ Top - Close Window ]
Credentials
Mortgage Partners
A unique set of credentials are issued for each organisation to be shared amongst all users. Your password will not expire, however it can be reset if required by sending a request to your Business Relationship Manager.
Mortgage Brokers
A unique set of credentials will be issued for you. Your password is a secure, unique, random 8-digit configuration that will expire every 180 days. DocSend will prompt you when it is time to change your password, however it can be reset if required by sending a request to Adelaide Bank Partner Assist.
[ Top - Close Window ]
Support
Should you experience any technical issues please contact:
Monday to Friday between 7am-6pm (CST)
For after hours, non-urgent issues email:helpdesk@adelaidebank.com.au
For access support or any other queries about DocSend please contact:
Monday to Friday between 8am and 6.30pm (CST)
For after hours, non-urgent issues email:brokersupport@adelaidebank.com.au
[ Top - Close Window ]
An Introduction to DocSend?
Logging In
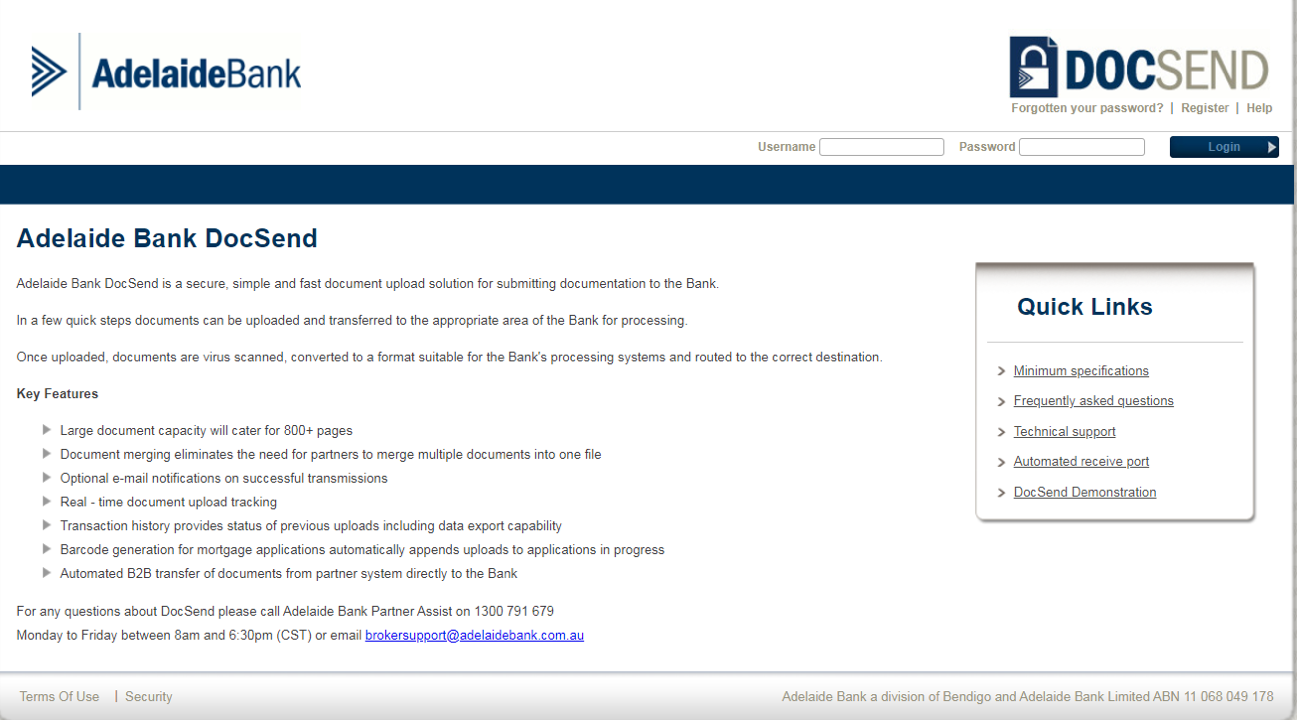
To log into DocSend you will require your Adelaide Bank Broker / Div Code (this will be your DocSend username) and the password provided by Partner Assist. On the DocSend home page enter your secure credentials (username and password). Upon successful authentication the home page will be refreshed and new options in the task bar will become available. You will now see your name in the top right-hand corner of the screen
If you have forgotten your password, click on the Forgotten Your Password? link located in the top right-hand corner of the page. Simply complete your details and submit your request to Adelaide Bank Partner Assist.
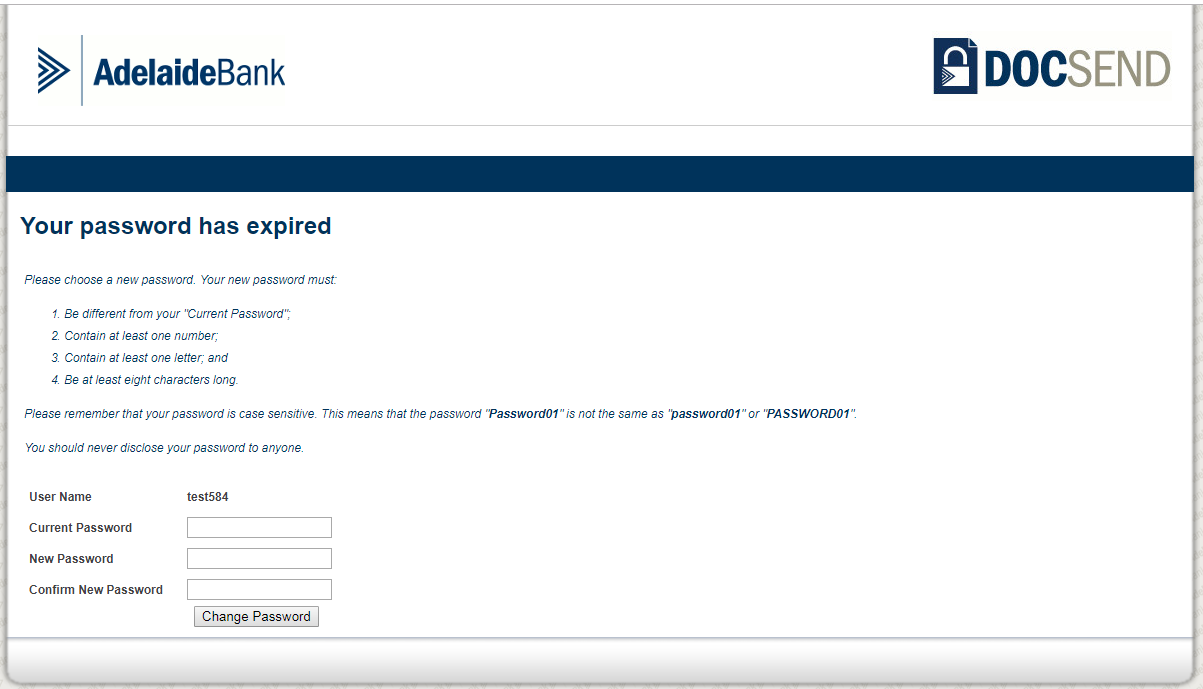
If your password has expired DocSend will prompt you to set a new password.
[ Top - Close Window ]
Upload Mortgage Documentation
Step 1 - Select Document Group
If you are a member of multiple document groups (destinations within the Bank) after logging on you will be asked to select a document group.
The following options may be available depending on access granted to you:
- Mortgages
- Portfolio Funding
- Margin Lending
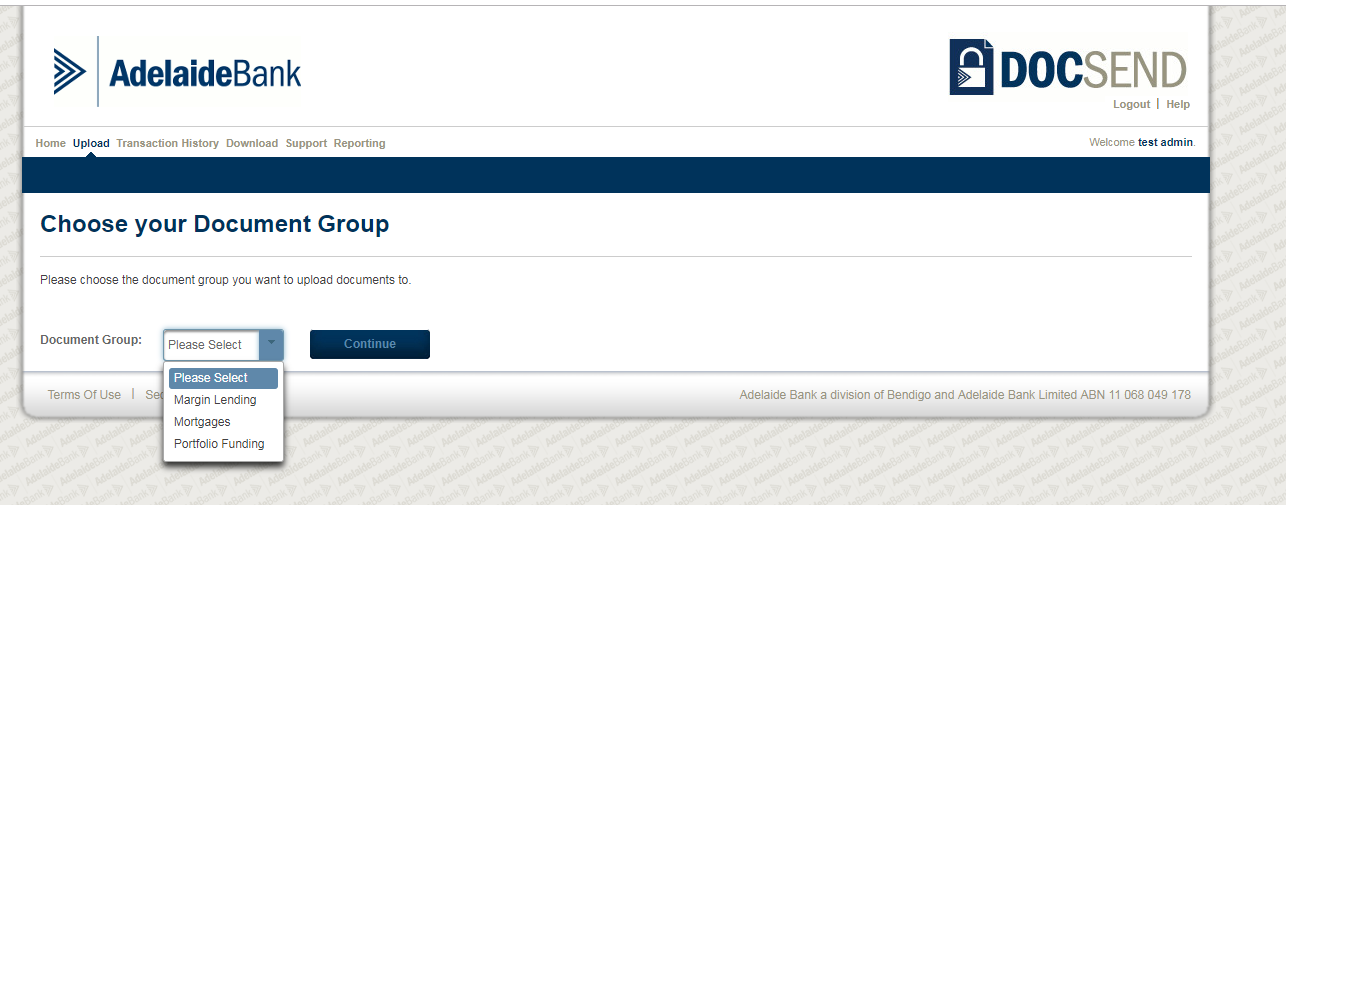
Select the required document group from the drop-down list and click Continue.
To continue to upload files, click on Continue and then click on Upload from the home page.
If you have access to a single document group simply click on Upload from the home page.
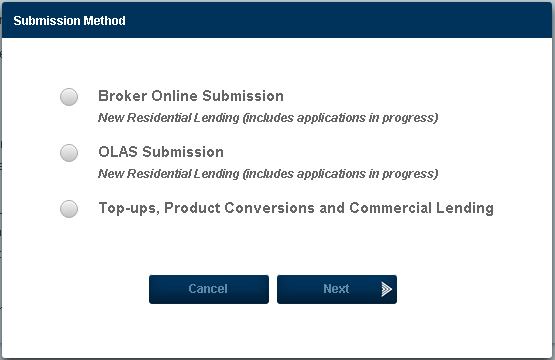
Step 2 - Select Submission Method (Mortgages document group only)
If you have selected the ‘Mortgages’ document group (or the only document group you have access to is the ‘Mortgages’ group) then the next step is to select the submission method. These details are used to route the documents to the correct mortgage processing system in the Bank.
- Select the required submission method and then click Next to proceed.
Note: if you selected a document group other than ‘Mortgages’ then this step is not required.
The following table explains when each scenario is applicable:
| Submission Method | Use when: |
| Broker Online Submission |
|
| OLAS Submission |
|
| Top-ups, Product Conversion and Commercial Lending |
|
If you select option 3 ‘Top-ups, Product Conversions and Commercial Lending’, then the following confirmation will appear:
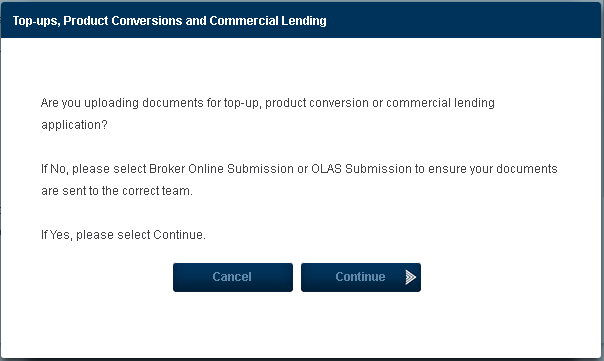
- If the documents you are about to upload relate to a Top-up, Product Conversion or a Commercial lending application then select Continue to continue to the next step
- If the documents you are about to upload are intended for a Broker Online Submission or OLAS Submission then please click Cancel, and then select either option 1 or 2 as appropriate
Note: This step has been added to help ensure documents are routed to the correct Bank system and to avoid delays in processing your request.
Step 3 – Enter Upload Details
To ensure the documents will be routed to the correct application, we need to capture some details about your application. The details required vary, depending on the document group and submission method selected.
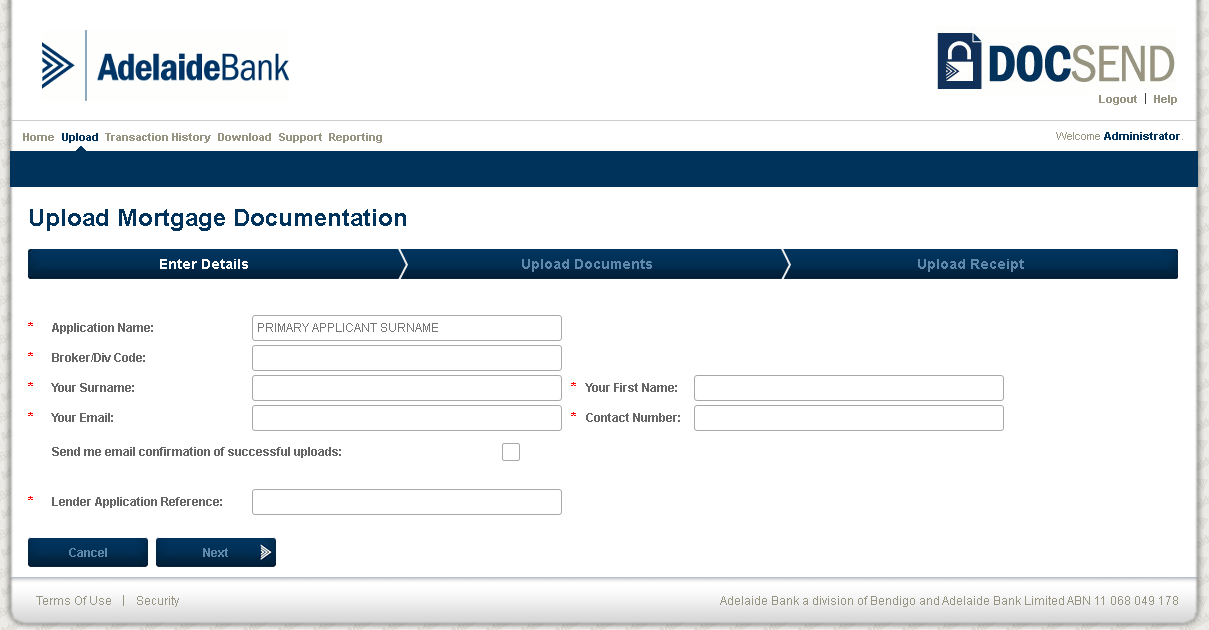
Broker Online Submission
After selecting ‘Broker Online Submission’ the following screen appears:
OLAS Submission
After selecting ‘OLAS Submission’ the following screen appears:
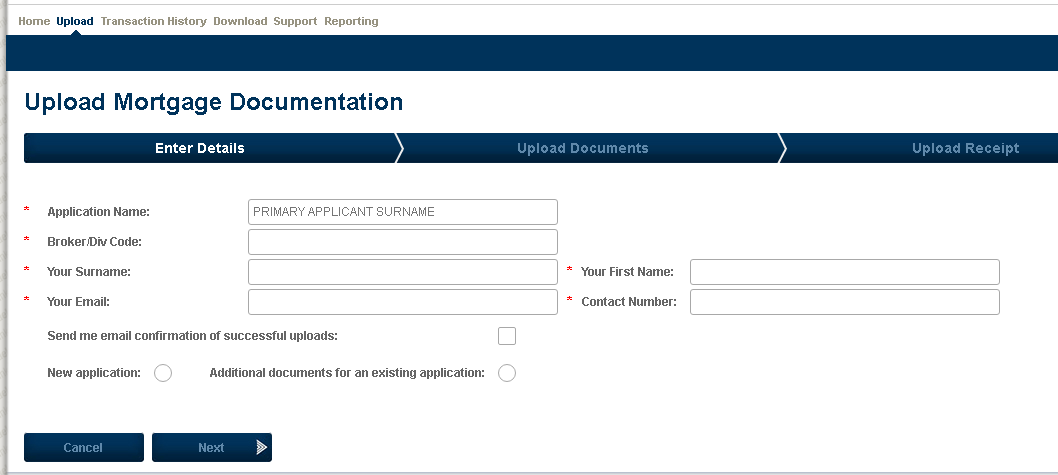
Top-ups, Product Conversions and Commercial Lending
After selecting ‘Top-ups, Product Conversions and Commercial Lending’ the following screen appears:
Complete all mandatory fields displayed on this screen and then click Next
The following table explains the purpose of each field:
The following table provides more information about the fields:
| Applicable to: | ||||
| Field | Description | Broker Online Submission | OLAS Submission | Top-ups, Product Conversions and Commercial Lending |
| Application Name * | The primary applicant's name |  |
|
|
| Broker/Div Code * | Your Broker/Div code. Must for 5 or 6 digits long | |
|
|
| Your Surname * | Your surname | |
|
|
| Your First Name * | Your first name | |
|
|
| Your Email * | Your current email address. Must be a valid email address | |
|
|
| Contact Number * | Your current phone number we can contact you on during business hours | |
|
|
| Send me email confirmation of successful uploads | Check this box if you want to receive an email confirmation once the upload has been complete | |
|
|
| Lender Application Reference * | The unique 9-digit lender Application Reference assigned to a mortgage loan application that was submitted online. (e.g. ApplyOnline) The uploaded documents will be associated with this application | |
 |
|
| New application | Check this box if the application is new and the application WIN is not known Note: always use this option for submitting documents for an Increase | |
|
|
| Loan Amount | Enter the loan amount of the new application when the WIN is not known | |
|
|
| Guarantor | Check this box if the new application includes a guarantor. Not required if the WIN is known | |
|
|
| Additional documents for an existing application | Check this box if the application WIN is known. You will need to enter the WIN Note: do not use this option for submitting documents for an Increase. Please use the New application option | |
|
|
| Application Number: WIN * | The unique 8-digit application WIN number assigned to the application if known. The uploaded documents will be associated with this application | |
|
|
| STP * | OLAS Unique electronic lodgement ID number | |
|
|
| Approved | Only required for OLAS applications submitted with an STP electronic lodgement ID | |
|
|
| Referred | Only required for OLAS applications submitted with an STP electronic lodgement ID | |
|
|
An Increase is a new application for credit and so you should check the New application checkbox. As increases are currently a manual submission, an STP number is not required.
Do not upload an increase as additional documents for an existing application or use a previous application WIN as a new case file will then not be created in the Processing Centre.
Additional documents for an existing application will require you to enter the WIN (Work Identification Number). This number can be located beneath the barcode on correspondence sent to you about your application. By capturing the WIN DocSend will generate a barcode that is appended to the documents uploaded. This guarantees the document bypasses our indexing process, automatically appends the document(s) to the application in progress and activates the file on the Bank's works queue ready for processing.
Send me e-mail confirmation of successful uploads provides you the option to request to be notified when your document upload has been successful. This is an optional feature.
If your upload was unsuccessful, you will be contacted by Partner Assist and will receive an email notification. The unsuccessful upload will be highlighted in your Transaction History by an alert icon. This will give you the opportunity to remove or replace the unsuccessful file and re send.
Click next to begin your upload
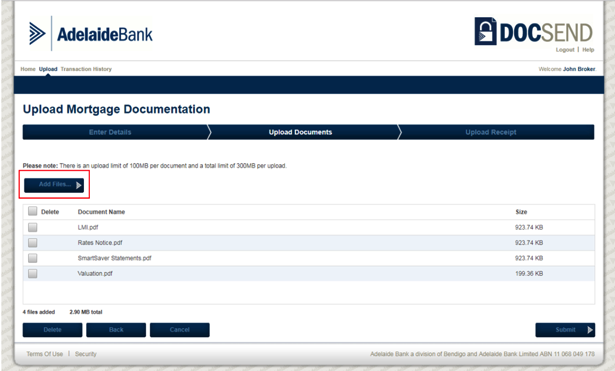
Step 4 - Add Files to Upload
Multiple documents can be uploaded in a single transaction. There is no need for you to convert multiple related documents into one file as DocSend will do this as part of the file transfer process.
To add document files to the upload:
- Click on Add Files
- Browse your directory to locate the relevant files for your upload
- Select the files to be added. To select multiple files, hold down
on your keyboard and click on each file you want to upload - The files to be uploaded will be listed on the screen
- Repeat the above steps until all the files you want to upload to the application have been added
Note: Please only add documents relevant to the application details provided in Step 3.
Accepted File Types
For each Document Group, the permitted file types are:
| Document Group | Submission Method | Acceptable File Types |
|---|---|---|
| Mortgages | Broker Submission | .pdf, .doc, .docx, .jpg, .jpeg, .tif, .tiff, .txt, .xls, .xlsx, .csv |
| Mortgages | OLAS Submission | .pdf, .doc, .docx, .jpg, .jpeg, .tif, .tiff, .txt |
| Mortgages | Top-ups, Product Conversions and Commercial Lending | .pdf, .doc, .docx, .jpg, .jpeg, .tif, .tiff, .txt |
| Margin Lending | - | .pdf, .txt |
| Portfolio Funding | - | .xls, .xlsx, .csv |
File Size Limit
Individual document sizes must not exceed 100MB.
- This limit can accommodate documents in excess of 200 pages.
- If you need to upload documents that exceed 100MB, it is recommended that large documents be split into multiple documents, and then add these smaller documents to the upload.
Upload Size Limit
DocSend can accommodate a total limit of 300MB and up to 150 individual files per upload.
Page Size Limit
Document page size must not exceed A4 in order to convert successfully to the Banks document imaging repository.
Special Uploads
DocSend gives you the ability to upload your edited Adelaide Bank Serviceability Calculator. Just save the completed calculator for your application and upload the file with the rest of your supporting documentation.
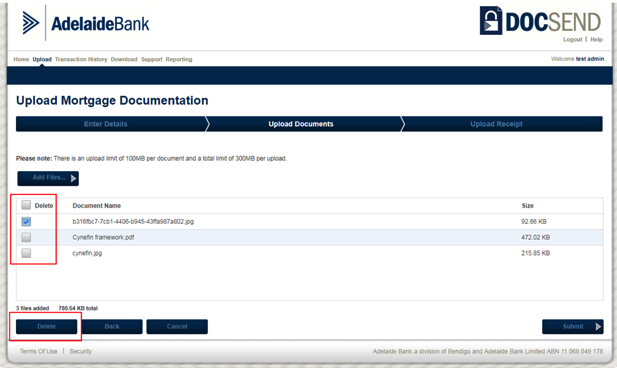
Delete Files
If a file has been added, and it is no longer required to be uploaded, it can be removed:
- Select the check box next to each file you would like to remove
- Click Delete
Cancel Upload
You can cancel your upload at any time before the Submit button has been clicked. Note that all documents that you have selected will be removed and you will not be able to return to this upload. You will need to re-start a new upload. A confirmation dialog will open asking you if you want to ‘Cancel document upload and return to the home page?’ clicking Yes will confirm the requested cancellation.
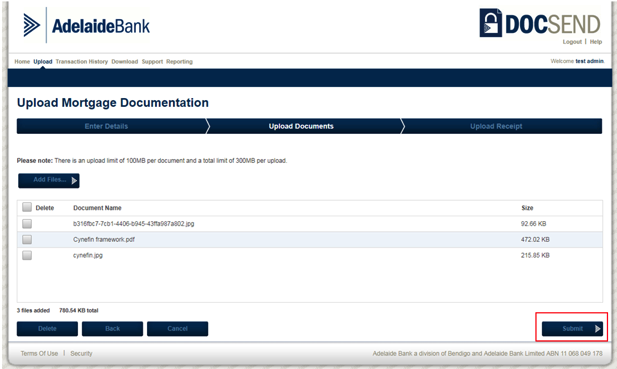
Step 5 - Submit Documents
Once all required files have been selected and are displayed in the file list on the Upload Documentation screen, then click Submit.
Note: At least one valid file must be selected before submission can occur.
After submission:
- DocSend will virus scan your files and then confirm that your upload has been completed.
- Once your upload is complete there can be no further modifications to the selected document(s).
- If you want to upload more documents for this application, then simply complete an additional upload and enter the same application details.
Upload Receipt
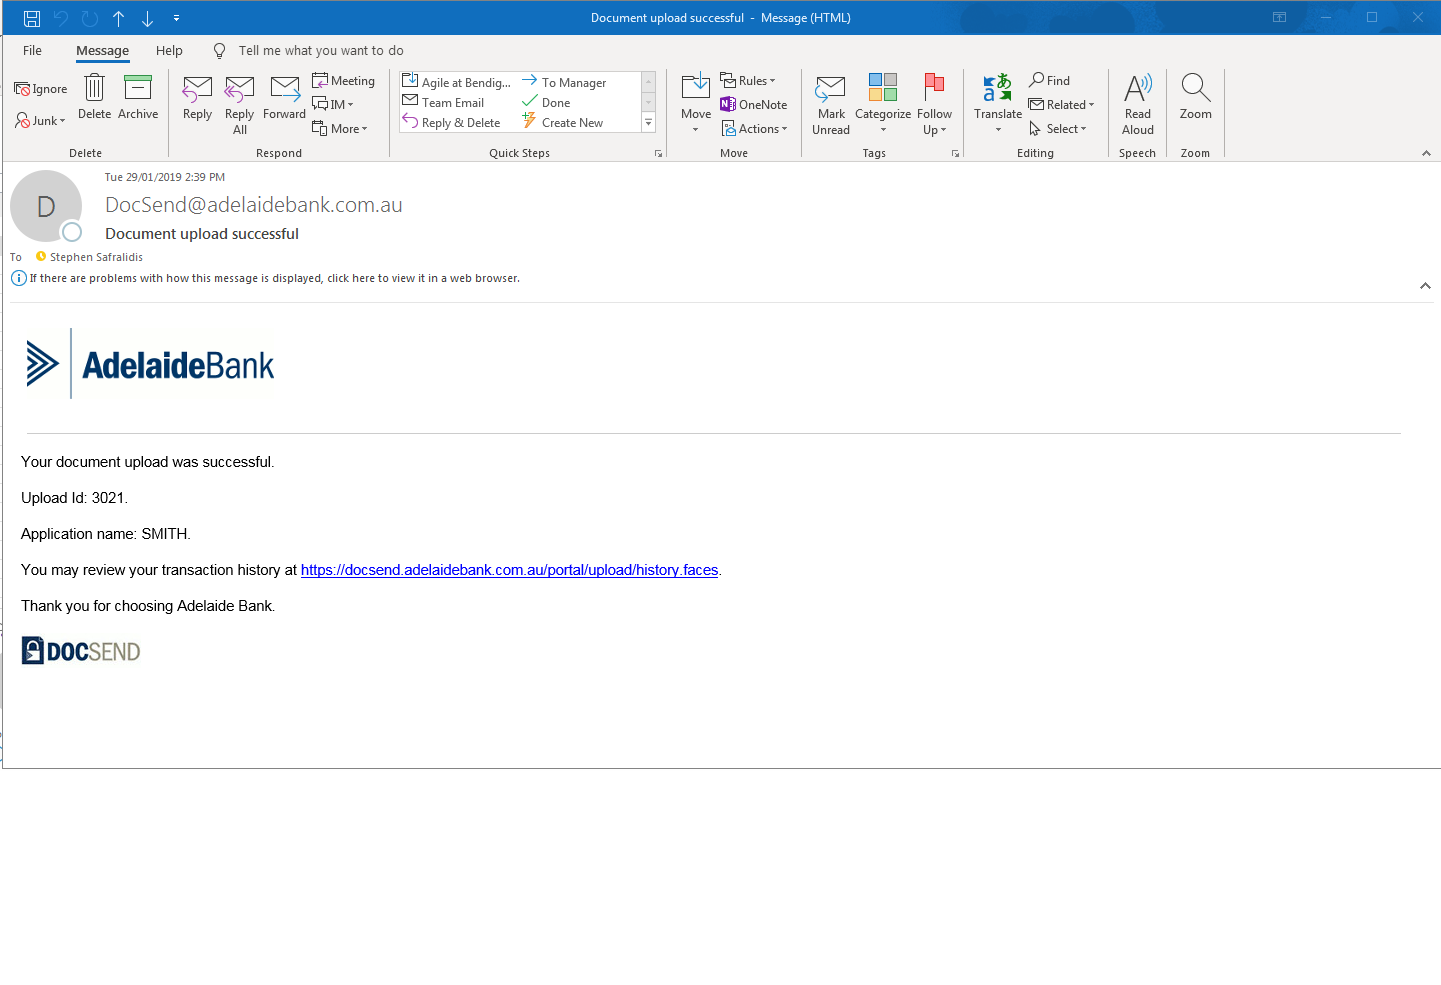
Once you have submitted your documents, you will receive a receipt for your upload. The receipt lists all documents submitted and includes a unique Upload ID which allows you to track your upload throughout the process.
You also have the option to Print a copy of your receipt for your file.
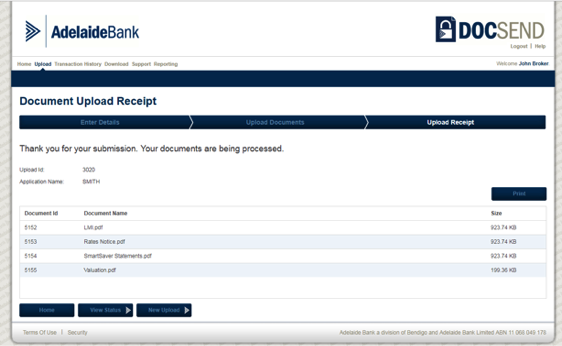
From here your options are;
| View Status | will take you to the Transaction History screen and to this specific upload record where you can continue to track the status or your upload. |
|---|---|
| Home | return to the Home page |
| New Upload | commence another upload |
[ Top - Close Window ]
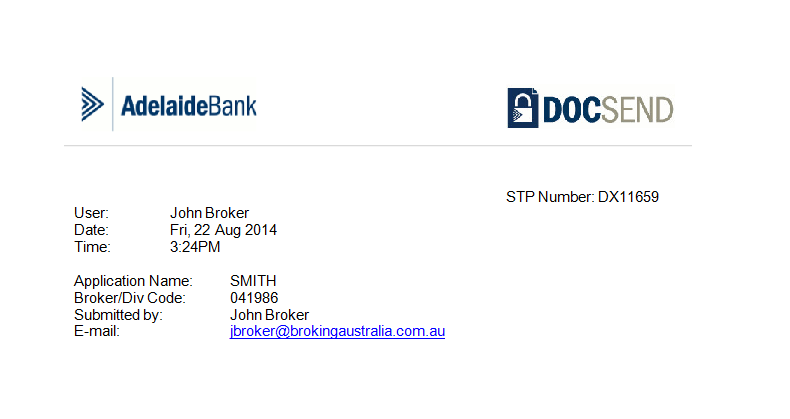
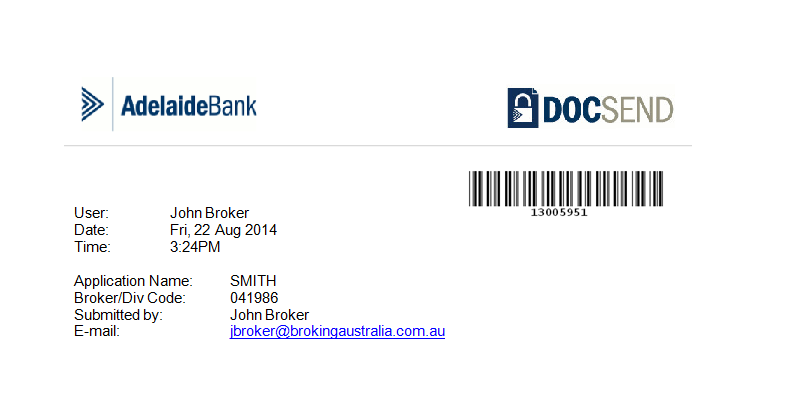
Automated Upload Header
Each time you upload documents to the Bank DocSend will automatically generate an upload header. The electronic header captures your details, application details and is date and time stamped. The upload header is automatically appended to your documents and can be viewed by bank staff on receipt of documents.
Note: You should continue to provide your application summary as it provides key contact details and processing information.
Electronic Lodgement
Where your application has been submitted electronically to the Bank, we need to capture the unique electronic lodgement reference number, either STP1 or Lender Application Reference2 in DocSend. This ensures that the documents you upload can be matched to the electronic application data that is automatically populated to our processing systems.
Barcodes
If your upload is for an existing application you will be required to enter the WIN3. By capturing the WIN DocSend can generate a barcode that will be appended to the documents uploaded.
This guarantees your documents bypass our indexing process, are automatically appended to the application in progress and the file activated on the work queue ready for processing.
Note: It is not necessary to store images of Bank communications with barcodes as DocSend will generate a barcode for your upload when you enter the WIN.
[ Top - Close Window ]
Viewing Transaction History or Status
The Transaction History displays the details and status of all the documents you have uploaded. To view the Transaction History or the Status of an upload:
- Either click on View Status on the Document Upload Receipt screen, or
- Select the Transaction History option from the menu tab.
- The Transaction History screen will be displayed:
Viewing Transaction History or Status
For each upload, the following information is be captured:
| Upload Id: | Unique reference number for the upload session |
|---|---|
| Upload Date: | Date and time status occurred |
| Application Name: | Application name assigned to upload (Surname of the primary applicant) |
| Broker/Div Code: | Unique Adelaide Bank accreditation number |
| STP: | OLAS Unique electronic lodgement ID number |
| WIN / Lender Ref: | The Bank’s application reference allocated to an existing application
|
| User: | Username of the user who submitted the upload |
| Uploaded By: | Name of user who submitted the upload |
| Status: | Current status of your upload |
For each document in an upload, the following information is captured:
| Document Id: | Unique reference number for each document in the upload |
|---|---|
| Document Size: | Size of uploaded document |
| Document Name: | Name of uploaded document |
| Document Status: | Current status of uploaded document |
Searching the Transaction History
You have the option to search for a specific upload using the search options located at the top of the Transaction History screen. You can also:
- Sort your upload history by clicking on any of the table headings to locate your upload details, and
- Select and expand each upload record to view the individual document s and their current upload status.
The transaction log captures information for documents uploaded using either the web interface or using the Auto Receive Port.
To search for a transaction:
- Enter the search criteria at the top of the screen.
- Click Search
- The search results will be displayed on the bottom of the screen.
Status Definitions
The following tables summarises the Upload and Document Status Definitions
| In progress: | Once an upload is initiated, it is automatically updated to this status. |
| Documents received: | The upload and all attached documents have successfully been delivered to Adelaide Bank. |
| Failed: | This status is triggered when one or more of the documents uploaded have encountered a failure.
|
Successful Submission
If the upload was successful, then the status will display ‘Success’. If you selected to receive an email confirmation, then you will receive an email once the submission has been successful:
Unsuccessful Submission
If your upload was unsuccessful:
- The unsuccessful upload will be highlighted on the Transaction History screen by an alert icon:

- You will also see a blue Review Upload icon adjacent to your upload Id on the Transaction History screen:

- You will also be contacted by Partner Assist, and
- You will also receive an email notification.
This will give you the opportunity to review the upload and either remove the unsuccessful upload or re-submit it.
Review Unsuccessful Upload
To review an unsuccessful upload:
- Click on the blue Review Upload icon:
- You will be directed to the Upload Documents page
- Files that DocSend was unable to repair will be automatically removed from the upload for you at this point.
- If you would like to proceed and submit the upload with just the successful files and without the failed file, then click Submit.
- If you would like to replace the failed file, add a replacement file to replace the one the file that that was rejected, then click Submit.
- The Upload Id will remain the same
- The replacement document set will be displayed in the Transaction History screen after your upload has been resubmitted
Note: Files that have been successfully uploaded do not need to be resubmitted.
Export Transaction History Data
You can export the transaction history data for analysis and reporting purposes. The data can be exported using the following file formats:
| Microsoft Excel | |
| Adobe PDF | |
| CSV |
To export transaction history data:
- Enter the search criteria at the top of the screen
- Click Search
- The search results will be displayed on the bottom of the screen.
- The results displayed on the screen will be exported. Modify the search criteria if the data displayed is not what is required to be exported
- Click on the required file format icon
- The transaction history data will be exported in the select file format
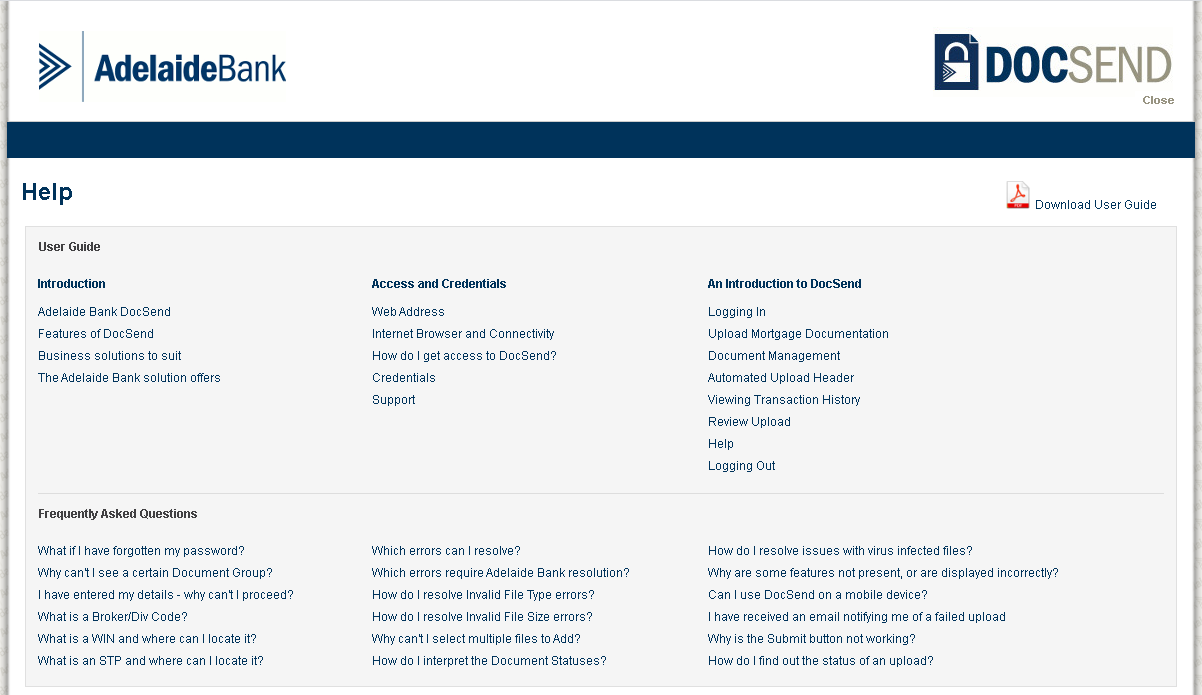
Help
Clicking on the Help link located under the DocSend logo will open and display this User Guide, along with some Frequently Asked Questions.
[ Top - Close Window ]
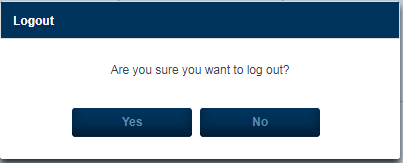
Logging Out
Logging out directs the you back to the DocSend Home page.
Note: If you log out in the middle of an upload session it will have the same effect as cancelling from the upload. All files selected but not submitted up until the point of logging out will not be transmitted and will be removed entirely.
[ Top - Close Window ]
Frequently Asked Questions
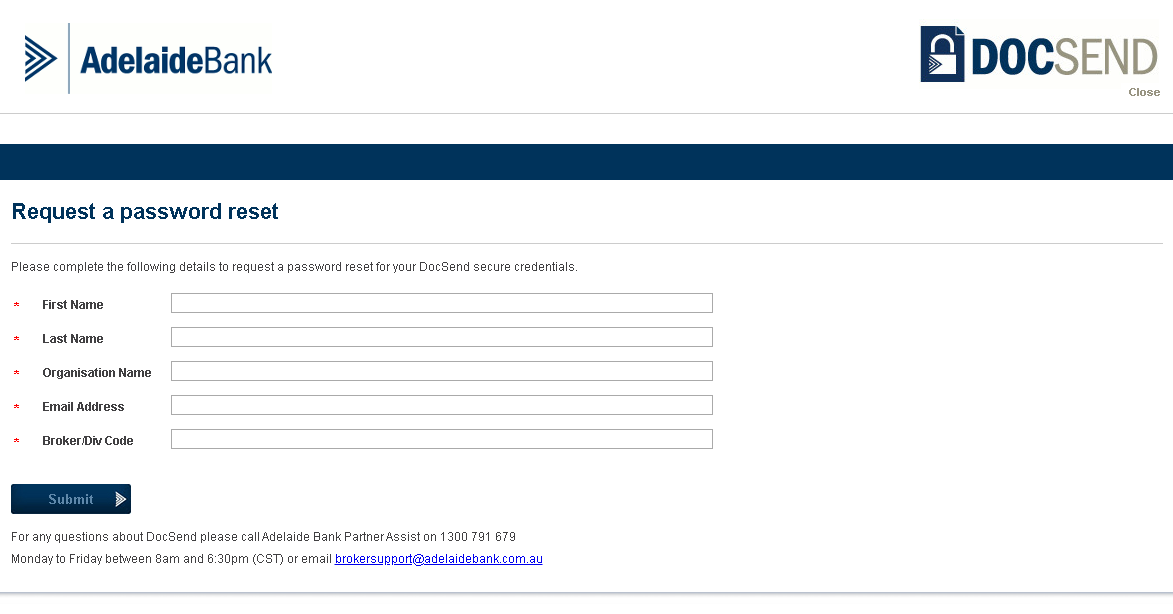
- What if I have forgotten my password?
- If you have forgotten your password you can request for a password reset directly via DocSend. Click on the Forgotten your password? link on the home page and complete the online form.
- Why can't I see a certain Document Group?
- It is possible that authorisation to upload to the Document Group in question has not been granted; see section Access and Credentials \ Support of the User Guide for contact details of relevant teams to confirm access privileges or request amendment to access permissions.
- I have entered my details - why can't I proceed?
-
- Check that the following fields (Your Surname, Your Email, Application Name, Broker/Div Code and WIN) have been entered. As user information fields are mandatory, you will not be allowed to proceed to Upload Documents if they have not been entered.
- 2. If all fields have been entered, check that the data entered does not contain any special characters and email address is formatted correctly. DocSend will display error validation messages to help you identify any unaccepted data.
- If following the instructions above does not resolve this issue, see section Access and Credentials \ Support of the User Guide and contact the relevant team for assistance.
- What is a Broker/Div Code?
- Also known as the Advisor Code or Broker Code, the Broker/Div Code is your unique bank accreditation code against which your upload will be lodged.
- What is the Lender Application Reference and where can I locate it?
- The Lender Application Reference is Adelaide Bank's unique 9-digit reference assigned to a mortgage loan application that was submitted online and is used to track the online application from submission to settlement. The Lender Application Reference is automatically displayed on the online application after submission, and on the Bank’s correspondence used during the processing of the application. Providing the Lender Application Reference is mandatory to ensure that documents are matched to the application data and your place reserved in the work queue. If you are unable to find the 9-digit Lender Application Reference, please contact Adelaide Bank Partner Assist.
- What is a WIN and where can I locate it?
- The Work Identification Number (WIN) is Adelaide Bank's unique 8-digit reference for your loan application while it is being processed in our Processing Centre. The WIN is used to track the application from submission to settlement. For the upload of documentation for existing applications, you are required to enter the WIN with the application details. Provision of the WIN ensures that any subsequent documents are automatically appended to the case and your place reserved in the work queue. If the WIN is misplaced or forgotten, please contact Adelaide Bank Partner Assist.
- What is an STP and where can I locate it?
- The Straight Through Processing (STP) number is Adelaide Bank's unique reference for each loan application submitted on the Online Loan Approval System (OLAS). The STP number is used to match application data loaded in OLAS with the supporting documentation when it is submitted to our Processing Centre. The STP number is automatically populated on the OLAS cover sheet.
- Which errors can I resolve?
- Resolution by you is required when the Application status is 'Suspended'; this is triggered when one or more documents uploaded within an application have failed file format validation or virus scanning. See below for tips on resolving these issues.
- Which errors require Adelaide Bank resolution?
- Given that files meet file validation criteria and are free from viruses, all other failures will be resolved by Adelaide Bank. Please contact Adelaide Bank Partner Assist if there are queries on the progress of issue resolution.
- How do I resolve Invalid File Type errors?
- See Document Management section of the User Guide for accepted formats. Though most common document file types have been accommodated, it is likely that other word processing applications or scanning devices are used.
- For users of multi-functional or scanning devices, please consult the manual for your device and ensure that scans are produced in pdf, jpg or tiff formats, as these are accepted by DocSend.
- For users of non-Microsoft word processing software experiencing difficulty with saved file formats, there are various software (PDFlite, CutePDF - search 'print to pdf') that allow printing to pdf format, effectively allowing most files to be saved as a non-editable pdf.
- How do I resolve Invalid File Size errors?
- The size limit for each individual file selected is 100Mb. Users are permitted to add multiple files per upload. The limit for the total of all files within an upload is 300Mb. For individual documents greater than this 100Mb or where the total upload size exceeds 300Mb, users are advised to either break the document down into portions no greater than 100Mb each or reduce the number of files submitted in a single upload.
- Why can't I select multiple files to Add?
-
Some older versions of browsers don’t support multiple file upload. If you are using an older browser you will need to select and add each file individually. Note: All browsers no longer support folder upload.
Browsers Single file selection Multiple file selection Internet Explorer 11 Internet Explorer 10 Internet Explorer 9 Internet Explorer 8 Mozilla Firefox Google Chrome Safari - How do I interpret the Document Statuses?
- See Transaction History \ Status Definitions sections of the User Guide for status definitions. Contact Adelaide Bank Partner Assist if further information is required.
- How do I resolve issues with virus infected files?
-
- Perform a virus scan and repair on your local machine. If you have a virus scanner installed on your computer, please use the virus scanner to perform a scan on the file(s) in question. Virus scanners will generally attempt to repair the file, if so, validate that the repaired file is not corrupt by opening the document and inspecting the contents.
- When all else fails and if access to a virus scanner is not possible, print the document and fax it to Adelaide Bank on 1300 ADL FAX (1300 235 329)
- Why are some features not present, or are displayed incorrectly?
- The design and testing of DocSend has accommodated a variety of browsers, however for optimal performance it is recommended that the latest version of the following browsers be used:
- Microsoft Internet Explorer
- Google Chrome
- Mozilla Firefox
- Safari
If you are already using one of the above browsers, upgrading to the latest version will resolve issues with page presentation and functionality.
DocSend has been tested against the following Operating Systems:
Web Browser Operating System Chrome v63 (or higher) Internet Explorer v10 (or higher) / Edge 14 (or higher) Firefox v58(or higher) Safari v8(or higher) Windows (7, 8, 8.1, 10) Mac OS X 10.10 and later iOS 10 and later Android 4.4 and later - Can I use DocSend on a mobile device?
-
Whilst DocSend has not being specifically optimised for use on mobile devices it does work on both tablet and mobile smart phone.
- I have received an email notifying me of failed upload
-
- Identify the file(s) within the upload with a 'Failed' status.
- You will be contacted by Adelaide Bank Partner Assist for details on why your file may have failed.
- Utilise the Review Upload function to either resubmit without the failed file or add a replacement version of the failed file and submit again.
- Why is the Submit button not working?
-
- Check that files have been added to the upload. Each application must have at least one document that is added.
- If your browser has been inactive for over 120 minutes, your session will time out and you will be logged out of DocSend and reverted to the home page. Any applications that have not been submitted prior to the timeout will need to be re-uploaded and submitted.
- How do I find out the status of an upload?
- Once a submission has been made, the status of an upload can be checked in the Transaction History. See Transaction History section of the User Guide for details on how to access this feature and search for transactions.
[ Top - Close Window ]